Windows 7 can still run smoothly with a few simple tweaks. Follow this 2026‑updated guide to boost boot times, improve responsiveness, and extend the life of your PC without reinstalling the OS.
1. Disable Unnecessary Visual Effects
The Aero theme looks great, but consumes valuable GPU and CPU resources. Switch to the “Windows 7 Basic” theme and turn off animations:

- Right‑click the desktop → Personalize.
- Select Windows 7 Basic under Themes.
- Click Window Color → Advanced appearance settings → Effects and uncheck all options.
These changes can shave several seconds off your boot time.
2. Clean Up Startup Programs
Too many programs launching at startup slow down boot and consume RAM. Use the built‑in System Configuration tool:
- Press Windows+R, type
msconfig, and hit Enter. - Go to the Startup tab.
- Disable any programs you don’t need (e.g., third‑party update managers, chat apps).
- Click Apply and restart.

Only keep essential items such as your antivirus.
3. Defragment Your Hard Drive (HDD only)
If you’re still on a mechanical drive, regular defragmentation improves file access speed.
- Open Computer, right‑click your C: drive → Properties.
- Go to the Tools tab and click Defragment now.
- Select Analyze disk, then Defragment disk if fragmentation is above 10%.
For SSDs, skip this step – it can reduce lifespan.
4. Optimize Services and Background Tasks
Many Windows services run by default but aren’t needed for everyday use.
- Press Windows+R, type
services.msc, and hit Enter. - Set these services to Manual or Disabled if you don’t use them: Fax, Remote Registry, Bluetooth Support Service (if no Bluetooth device), Windows Search (if you rarely search locally).
- Leave critical services such as Windows Update and Security Center enabled.
5. Upgrade to an SSD (If Possible)
Swapping a traditional HDD for a solid‑state drive yields the most noticeable speed boost – faster boots, quicker application launches, and snappier overall performance.
Clone your existing Windows 7 installation to the SSD with tools like Macrium Reflect Free or Clonezilla, then change the boot order in BIOS.
6. Keep the System Updated
Even though Windows 7 reached end‑of‑life, critical patches are still released for supported enterprise editions. Run Windows Update regularly to get performance‑related fixes.
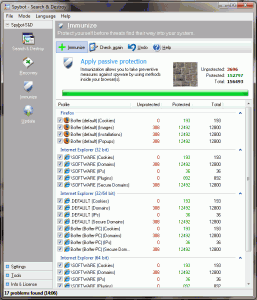
7. Run Disk Cleanup and Remove Junk Files
Windows includes a built‑in utility to clear temporary files:
- Search Disk Cleanup from the Start menu.
- Select the system drive (usually C:).
- Check boxes for Temporary Internet Files, Recycle Bin, Temporary Files, and click OK.
For deeper cleaning, CCleaner works well on Windows 7.
8. Enable ReadyBoost (For Low‑RAM Systems)
If you have limited RAM (≤ 2 GB) and no SSD, you can use a fast USB flash drive as additional memory:
- Insert a USB 3.0 flash drive.
- Right‑click the drive → Properties → ReadyBoost tab.
- Select Use this device and allocate the recommended amount.
ReadyBoost can improve UI responsiveness, though it’s not a substitute for actual RAM upgrades.
9. Run the Windows Performance Troubleshooter
Windows includes a built‑in wizard that can detect common performance bottlenecks.
- Open Control Panel → All Control Panel Items → Troubleshooting.
- Select System and Security → System Maintenance.
- Follow the prompts to let Windows diagnose and suggest fixes.
Conclusion
By disabling heavy visual effects, cleaning startup items, defragmenting (or upgrading to an SSD), and trimming unnecessary services, you can breathe new life into a Windows 7 machine. These tweaks are safe, reversible, and require no reinstall, making them ideal for extending the usability of older PCs.